 |
| google image from kshownow.net |
Thanks to my sister for the tutorial. She taught me well how to use Aegisub with a lot of screaming than normal talk. Hehe.
A) Applications needed for this
# Aegisub<http://www.aegisub.org/>
# VirtualDub <http://www.virtualdub.org/>
# Video Converter – it’s safer to convert the video to AVI format since VirtualDub cannot
process some other video formats.
B) The Different Between ‘Hardsubs’ and ‘Softsubs’?
+ Hardsubs – Subtitles that are encoded directly into the video image and cannot be
removed or altered.
+ Softsubs–Subtitles that are stored separately from the video image. It can be enabled or
disabled. Depending on the format of the softsubs, the way that it’s appear
onscreen may be customizable.
(Taken from http://www.darksmurfsub.com/)
START TO MAKE ONE!
1) Choose a video. Type or copy the subtitle in the notepad and save it as Text Documents
(*.txt).
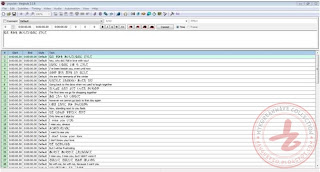
 |
| Separate the subtitle line with enter. |
2) Open Aegisub. **Make sure to convert your video into AVI first to make it easier.**
3) Open File > Open Subtitles... andclick on your subtitle.
4) Open Video > Open Video... and choose the video for the subtitle. **Remember to convert
your video into AVI because the timecodes and frames maydiffer from other video files.**
5) Open Audio > Open Audio from Video.
You can adjust the horizontal zoom and vertical zoom at the right side of the audio corner to zoom in. For me, it’s easier to make the timing for the subtitle.
6) Now that everything is ready, you can proceed for the timing of the subtitle.
7) Make the video smaller and the audio bigger. *The video functions as to check your timing
and the style for the subtitle. The subtitle will be shown on the video.*
8) Click on the line you want to time. Select its audio by clicking it on the sound wave and
listen to the audio for confirmation using ‘Play selection’ button. Then, click the ‘Commit’
button to apply the time from the audio to the selected line.
9) After you finish the timing, it’s time to edit the font and the color of the subtitle.
10) Open Subtitles > Styles Manager…
11) Click ‘Edit’ button at the bottom. Now, you can rename the style, change the font, the
color and the position of the selected line.
12) After that, click the ‘OK’ button or the ‘Apply’ button.
13) Choose the customized style at the ‘Catalog of available storages’ on the top. The
customized style will show up at the ‘Storage’. Click ‘Copy to current script ->’ button
and close the styles manager.
14) Choose the customized style at the ‘Style for this line’ box below the audio corner, beside
the ‘Comment’ box. Then, click the ‘Commit’ button.
15) Lastly, save the subtitle as Advanced Substation Alpha (*.ass).
16) Finish! But! If you want to put the subtitle permanently into the video (hardsubs), you
need to use VirtualDub (refer to the notes at the top).
17) Open VirtualDub, open File > Open video file… and choose your video.
18) Open Video > Filters…> Add…>TextSub by Gabest and choose the corresponding
subtitle.
19) Open File > Save as AVI > OK.
20) Now you can watch the video without turning on the caption.
++ Remember, this is only for beginner.
++ This tutorial is based on my own experience. So, some instructions may differ from
other tutorials.
The video result:


No comments:
Post a Comment